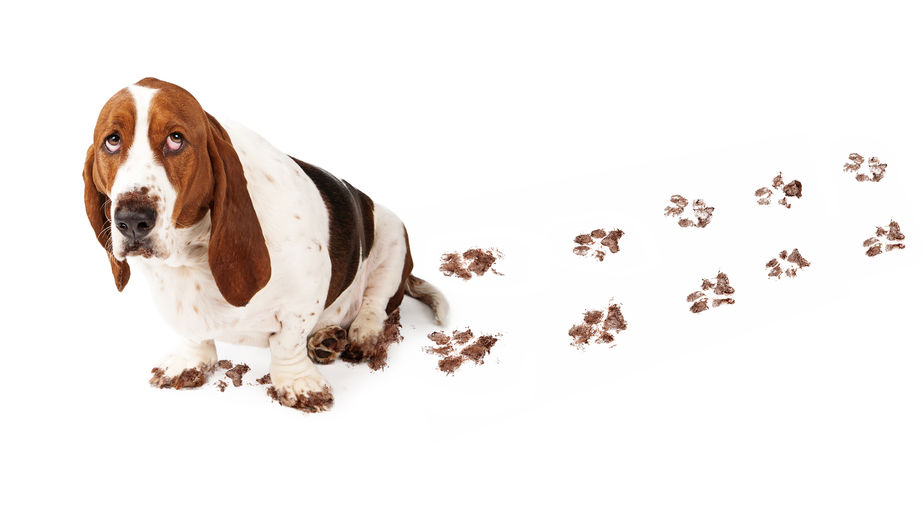
Having a pet as a member of your family is truly a great experience, but there comes a price with it like everything else. Cleaning up after your pet can be annoying because it’s usually a common occurrence. Whether it’s cleaning up their eating area or cleaning up an accident they had in the house, an eraser sponge is the way to go.
Why the Eraser Sponge?
As parents of animals, we don’t always have the time to grab a bucket, fill it with water, and wet a mop, to wipe up floors; or time to get down on our knees with a bucket full of water and a sponge to clean up scuffed cabinet doors. The eraser sponge makes it easy to clean up spills, scuffs, and dirty paw prints in a snap. Also, it is simple to use for cleanup, so you can show your kids how to clean with it. The eraser sponges from Sponge Outlet are strong enough to use on almost any grit, grime or dirt without compromising your counter-tops, walls, floors or other surfaces.
Giving a small child a mop and bucket of water can create even more of a mess than the one you were attempting to clean.
Keep the eraser sponges handy, and have your kids watch you clean up scuffs and marks left by your pets; then engage them in the activity with you.
After using this technique, your kids will be able to always clean up after your pet makes some kind of a mess. An eraser sponge is your all-purpose cleaning tool for households with pets. You won’t need to switch up from a sponge to a mop.
You can clean all your pet’s messes with the eraser sponge; making the clean-up process easier and quicker. Now you can get back to the other tasks on your to-do-lists.
If you’re looking for an easier way to clean up after your pet’s mess, contact Sponge Outlet at 877-776-6430to find out more on our eraser sponges and how they can help with pet messes.
The holidays are a time for special decorations, gifts and visitors, all of which require extra preparation and cleaning! So how can you tackle the messes around your house in time for your guests’ arrival? Follow these helpful holiday cleaning tips for the home.
Space Out Holiday Cleaning and Do It Early
To avoid feeling totally overwhelmed, try cleaning a little bit every day. You can divide up your cleaning task by the task itself, or clean an entire room a day.
wiping or cleaning surfaces (tables, countertops, appliances)
vacuuming and/or mopping
Cleaning by Room
Guest bedroom (if guests are staying overnight)
Living room/family room
Dining room
Hallway or mudroom
Kitchen
Bathroom
Using this method allows you time to do a thorough job without being rushed or left exhausted. Plus, you will have enough energy afterwards to enjoy time with your holiday guests. Before guests arrive, perform quick touch-ups such as wiping down counters and putting away items.
Don’t Overlook These Spots When Cleaning for the Holidays
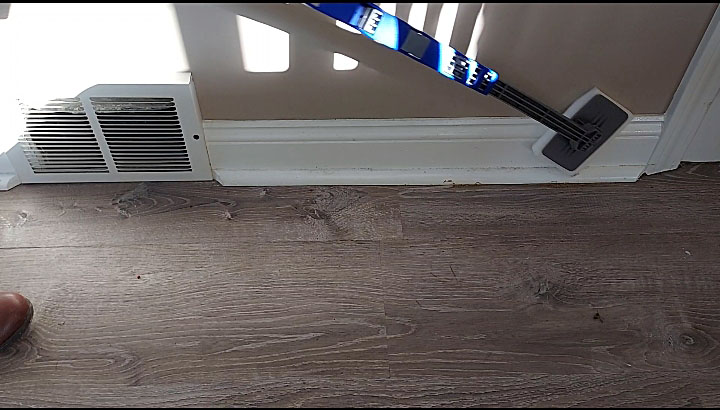
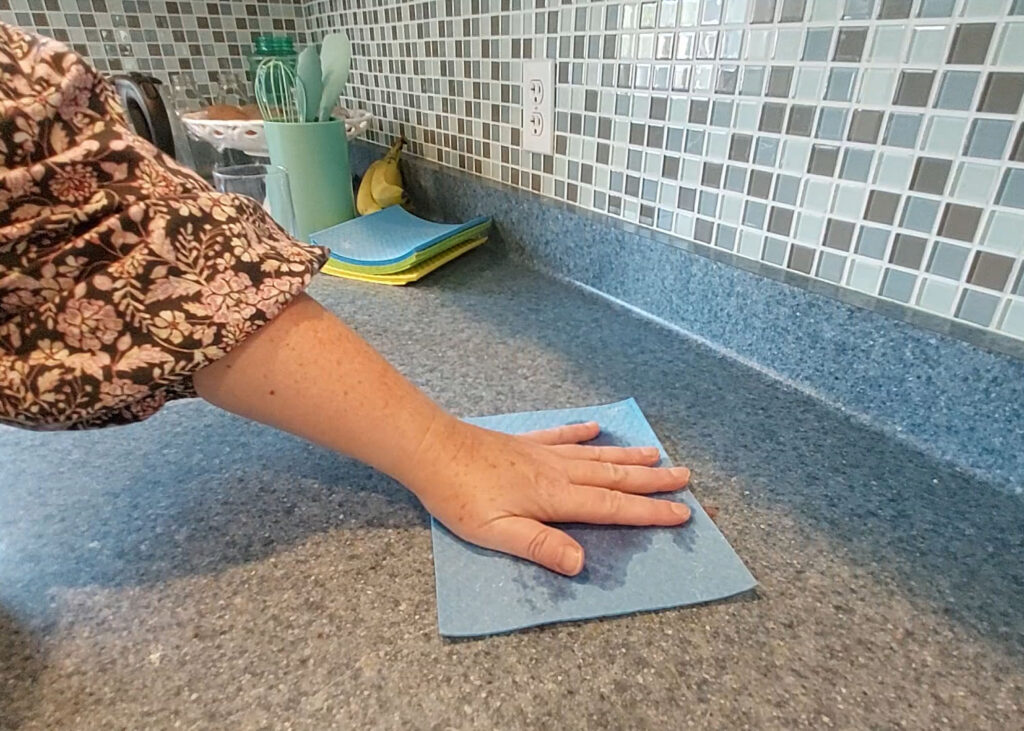
It’s easy to overlook light switches, doors and baseboards as we don’t tend to notice these items on a daily basis. Use a wet Eraser Sponge to remove scuff marks from walls and doors, fingerprints and smudges from light switches, and dirt and grime from doors. Try our Eraser Sponge Extension Handle Kit to clean your baseboards without bending. It comes with four eraser sponges that attach to the handle via Velcro.
To use,:
Wet one of the kit’s eraser sponges and squeeze out the excess water
Stick it to the end of the handle
Use the buttons on the handle to extend it to desired length
Press it firmly against a baseboard, wall, or other surface and gently move it back and forth to clean away dust, dirt, stains and dark scuff marks.
Holiday Cleaning the Entryway
Your entryway is the first thing guests will encounter when they arrive at your home, so making sure it’s spick and span will guarantee a good first impression. Wipe down your front door with our Eraser Sponge, shake out the doormat and add some festive decorations like a holiday wreath and garland. Also be sure to organize coat closets and shoe storage so everything is neat and tidy. A clean and cozy entryway is just what you need to make your guests feel welcome!
Holiday Cleaning Tips for the Kitchen
All of your delicious food will taste better in a clean oven! Mix white vinegar and baking soda together to create a foamy mixture. Let it sit on greasy spots and then use our scrubby sponge to scrub it clean. Next, declutter your countertops and wipe them down with a Swedish Dishcloth. The Swedish Dishcloth is non-scratch and safe to use on marble and granite countertops and on wood cabinets.
Preparing a Guest Bedroom
If your guests are visiting from out of town, chances are they are staying at your home for all of the holiday fun. You’ll want your guests to feel like they are in a home-away-from-home, so make sure the guest bedroom is ready with fresh sheets, towels and extra toiletry items. If you don’t remember the last time you had guests stay over, chances are there is a lot of dust in the room, so you’ll want to remove it with microfiber cloths or a microfiber duster.
Not only will your guests need a place to sleep, but they will also need somewhere to put their clothing, coats and luggage. Tackle one closet at a time and empty everything out of it. After the closet is empty, create four piles: keep, give away, throw away and store. Don’t forget the golden rule: if you can’t remember the last time you wore or used something, get rid of it!
Tips for Cleaning the Bathroom
Go through the closet and medicine cabinets and get rid of any unnecessary items. Add new towels and replenish toilet paper and hand soap so you don’t have to worry about running out when the Christmas craziness begins.
Wipe down the bathroom sink, clean the toilet and mirror. Eraser sponges are great for removing dirt and grime from shower stall floors and soap scum from glass doors and tiles. You can also use an eraser sponge to clean the sink, floor and toilet bowl.
Now your home is ready for lots of company and entertaining! For home-cleaning supplies, shop now!
Let’s face it. Life is full of little messes and you need the proper tools for cleaning them up. But with so many cleaning products to choose from, how do you know which will work best for your particular situation?
We’ve highlighted a few of our best-selling products below to help you narrow it down.
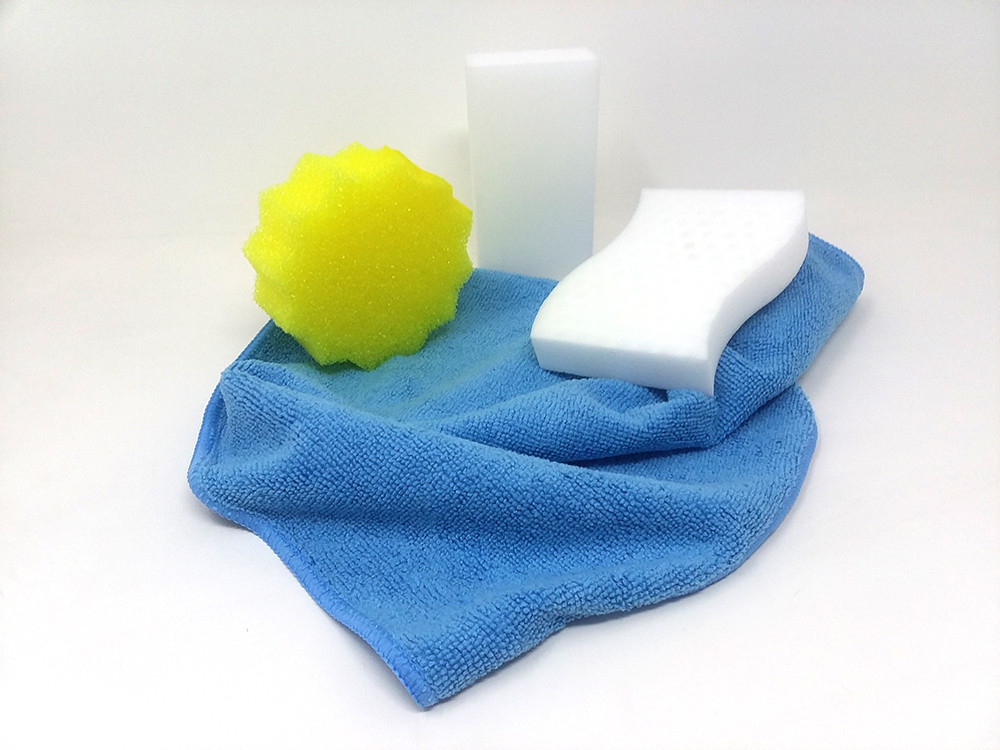
Microfiber Cloths- Gentle and Versatile
Made from synthetic materials, microfiber cloths can be used for many different applications including cleaning smooth and delicate surfaces. They are tough enough to soak up dirt and oil yet they are soft enough that they can be used forcefully without creating scratches.
When you aren’t using them for dirty messes, microfiber cloths are great for dusting because they naturally attract dust with their electrostatic properties. They can also do great things for stainless steel surfaces, windows, antiques, and other sensitive surfaces. They are also great for polishing mirrored or reflective surface and can really make them shine.
To remove and capture dust, try slightly dampening them with water before dusting to make sure that dust is collected by the cloth and not just disturbed on the surface or moved into the air.
According to experts, microfiber towels should not be washed with other items of your laundry in order to avoid cross-contamination with dirt, dust and leftover cleaning agents. Also, these cloths are highly sensitive and easily attract lint and stick to other cotton fabric items. Washing the towels only with other microfiber towels should prevent them from gathering lint and sticking to other laundry items. Do not use bleach, fabric softeners, detergents with added fabric softeners, or highly-fragrant detergents to clean your microfiber towels because it will cause the cloths to be less effective at cleaning. Air dry or tumble dry on a low or no-heat setting to prevent the looped fabric from becoming damaged from heat. Do not use dryer sheets when drying your microfiber towels as the sheets can coat the fabric with fabric softener and make the towels less effective at cleaning.
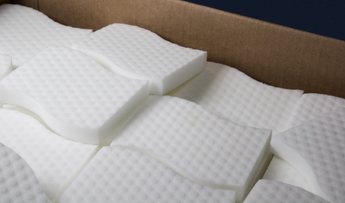
Eraser Sponges – A Cleaning Product with So Many Uses
If you think that all sponges are the same, then you have never used the miraculous eraser sponge. This water-activated tool works on a variety of surfaces and can clean just about every form of filth. With just a bit of water, it can clean walls, floors, and other surfaces. Crayons, pencil marks, dirt, grime, and scuff marks are no match for the eraser sponge; it’s like magic!
The Instant Erase sponge is also available in an extra strength melamine eraser sponge which makes quick work of the harshest grease, grime and baked-on stains. The extra strength eraser sponge is compressed to give it lasting cleaning. It also has a textured surface to help it clean grout lines on tile or remove tough stains.
To clean an eraser sponge, just rinse the sponge under water to remove dirt. Sometimes you have small and very dirty jobs, like removing mud from the soles of a sneaker. For small dirty jobs like this, you can cut the sponge into a smaller piece, do your cleaning and then dispose of the dirty sponge afterwards. This also helps stretch your supply of sponges and the new shape might help it reach into corners and small areas.
Scrubby Sponges For Tough Jobs
Our scrubby sponges can do wonders for everyday general cleaning, from simple to tough. This sponge works great with typical spills including those on bathroom surfaces, countertops, and more. The coarse, hard scrub surface can also help clean tough dishes or grease soiled kitchen surfaces.
Some of our scrubby sponges have both a cellulose side and abrasive side so they can handle just about any cleaning needs.
After many cleanings, sponges can sometimes smell. To prevent this, make sure you rinse them after use and allow them to dry out. You can also toss your sponge into the top rack of your dishwasher for easy cleaning .
Cleaning Product Tips
Before using any cleaning product, it’s always wise to test the product on an inconspicuous spot on the surface you plan to clean. Do this first before using the cleaning product on the entire surface. Look for scratches or dulling of the surface before you continue to clean.
You do not always need to deeply clean your cleaning tools between uses, but a quick rinse and thorough dry will help extend their lifespan and keep them working effectively. For example, you do not always need to wash your microfiber towels in the washer after each use. In between washings shake out your microfiber towel over or inside a trash bag to catch any loose dirt or dust and rinse under water to remove any remaining dirt. Allow the towels to air dry and they are good for another round of cleaning.
If you store your cleaning supplies together, colors can sometimes help you remember which towels are used on what surfaces. You would not want to use the same sponge to clean your kitchen that you use to clean your bathroom, for example. By color-coding your cleaning supplies, this help prevent any cross contamination.
Spongeoutlet is the leading online distributor of bulk melamine eraser sponges, microfiber towels, dusters, mops, and other essential cleaning supplies.
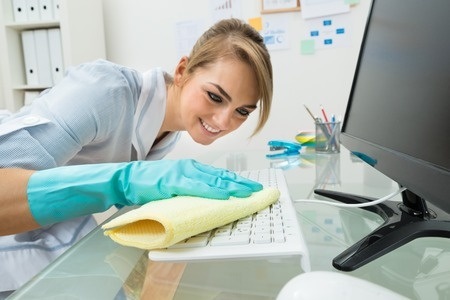
If you work in your own office, or even at your own desk space, you’re probably surrounded by office supplies such as pens, files, paper clips, and so forth.
Most of these items are covered in germs, and we often neglect them.
At the end of a long day, it can be easy to get up and leave work without cleaning up the space in front of you.
However, the common office items on your desk are probably dirtier than you think and deserve a little bit of attention.
Don’t have Forbidden Foods around.
We all eat at our desks on occasion, but it is important food of our desk as soon as we are done.
If you’re done drinking that cup of coffee, rinse out the mug. If you’re done eating the food in that bowl, get rid of it.
Food can not only stain desks and make for a messy work space, but it can also cause your desk to smell which will not sit well with your coworkers.
Use a little Elbow Grease
You might not want to wipe down your desk and disinfect it after an eight hour day of e-mails, meetings, phone calls, and otherwise, but wiping down your desk is the most effective way to keep it clean.
A damp paper towel is not enough.
Purchase a reliable eraser sponge, a good cleaning solution, clear your desk completely off, and wipe it down. This will help ensure that dust, grime, crumbs, and germs are eliminated.
Get rid of the Dreaded Dust
You’ve probably noticed that your desk, your keyboard, your computer, all get extremely dusty.
You want to protect your technology from dust settling in. You can easily wipe down a computer or laptop with a microfiber cloth. It won’t scratch the screen and it won’t leave behind small particles.
You also just dust the surface of your desk with a microfiber cloth as well to clear it of dust.
Clear the Clutter
If you want to clean up your desk space, consider “purging” a bit.
If you have 10 pens that don’t work, throw them out.
If you have pictures that have seen too many coffee stains, discard them.
We tend to keep things “just in case” but if you haven’t used that memo pad in four years, you probably don’t have a purpose for it.
Instead, consider giving it to someone else in the office that might need it.
Looking for sponges, microfiber clothes, floor cleaning pads, and otherwise to clean your office space? Visit Spongeoutlet.
Our surrounding bodies of water will soon be bodies of ice.
Boat owners are starting to prepare their boats for winter storage and we have some hints to offer on how to do this properly.
It is vital that your boat is stored appropriately in order to keep it secure and well-maintained. Boats are expensive investments and they must be cleaned properly before they are stored for the winter.
Boats are exposed to all different kinds of elements. Salt, seaweed, algae, and barnacles are just a few things most boats come into contact on a regular basis.
All of these different elements soil the boat, even in the places that you can’t see.
In order to preserve your boat in the winter, all of these elements need to be cleaned completely off of your boat.
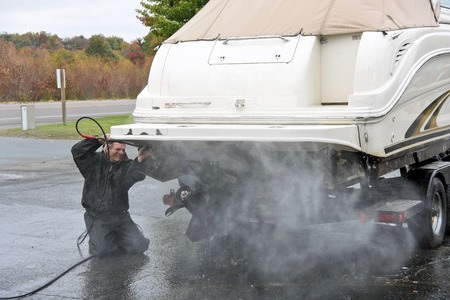
Thoroughly Rinse the Boat to Start Cleaning
Make sure that you spray down your entire boat with water first. A power washer can sometimes work better than a standard hose because it provides more pressure to clear out nooks and crannies. Make sure are rinsing all aspects of the boat including the topside, bottom, and deck.
You should also make a point to clean all of the hardware and trim.
You should also be purchasing proper boat cleaner and bilge in order to get further treat the boat.
Open any seacocks to drain remaining water out.
Use Proper Boat Cleaner
If your boat has a decent amount of salt residue, let the water sit and dissolve the salt a bit. After it dissolves, rinse it with water again.
Rinse the boat from the top down to ensure you are rinsing the salt off of the boat instead of just around the boat.
Be sure to purchase proper boat cleaner in order to treat the boat properly.
Scrub The Boat Body with Eraser Sponges
In order to clean the boat, you’ll need a tough companion to get the job done.
Sponge Outlet’s eraser sponges can easily pick-up dirt and grime from every section of your boat.
Before you start scrubbing, we recommend resting the eraser sponge on an inconspicuous section of the boat.
We recommend doing this as a precaution so you are certain that the strength of the sponge will not harm the boat.
Consider Waxing the Boat
After you have your boat completely washed, you should really consider waxing the boat as well.
Waxing your boat will seal and protect your clean boat from any winter weather that it might face.
Wax can protect your boat from temperature changes and preserve shine.
Before you store your boat, make sure the boat is completely dry to avoid mold and mildew from settling in. If possible, open any seacocks to drain remaining water out of the boat.
Cleaning and waxing your boat before storing for winter months will prevent dirt and corrosion from getting comfortable.
As the holiday season approaches, many of us picture the notorious dishes that pile up at family gatherings.
We often start cooking more frequently in fall and winter months.
We are also typically hosting larger groups of people than normal.
Some of our dishes cannot safely be put into a dish washer, but if you know how to properly wash those dishes, they won’t be as intimidating sitting in the sink.
Wear Protective Gloves
Hot water can take a toll on our hands, especially in winter months when our skin is already prone to dryness. Dish water can often leave our hands brittle and irritated.
Dish washing gloves are usually thick which means they can also protect your hands from loose knives in the sink. The gloves, typically made of rubber, will also help you hold onto slippery dishes when you’re struggling to hang onto Grandma’s valuable china.
Turn Up the Temperature
Hot water can make a huge difference when it comes to washing dishes. It can be hard to dip your hands into hot water, but that’s what the gloves are for!
Fill your sink with several drops of dishwashing liquid and fill the tub with the hottest water you can tolerate.
The hotter water you can use, the less likely you will be to have spots and streaks on your dishes.
Hot water will make cleaner dishes. Hot water can also help to break down food and grease on dishes, making it easier to scrub them clean.
Choose the Right Sponge
You need a sponge that is reliable, strong, and tough when you are trying to conquer a lot of dishes at once.
Our Extra Strength Eraser sponges are fifty percent stronger than our standard sponges. We suggest using these on dishes that are heavily soiled.
For instance, burnt baking sheets are an ideal job for our extra strength eraser sponge.
We also sell Microfiber drying towels which offers an impeccable polished clean when drying dishes. The clothes will never scratch a dish or leave lingering fibers.
Rinse Dishes Clean ASAP
If you are hand washing a lot of dishes throughout the day, you will likely reach a point where you’d prefer to just visit with your company and that’s ok to do.
The dessert dishes can wait. If you serve an apple pie, most dishes will be sticky and have some sort of food residue on them.
If this happens and you don’t feel up to washing them right away, just make sure you rinse them with hot water and soak them with a few drops of dish soap to make them an easier clean tomorrow.
The holiday season should be a time of great joy. Don’t rain on your Macy’s Day Parade by obsessing over the amount of dishes that are accruing.
Sponge Outlet has products that can cut the time it will take you to wash those dreadful dishes, giving you more time to enjoy the celebrations around you.
Using a microwave has become a convenience many people are enjoy using in daily cooking.
Sometimes, at the end of a long day, it’s such a luxury to be able to heat something up in the microwave instead of preparing a meal for yourself.
However, microwaves are not our cleanest household item.
Many of us let food splatter and we are guilty of saying we will “get to it later” but find ourselves never going back.
Microwaves are notorious for containing germs, especially if the microwave is rarely cleaned. Germs multiply most easily in warm settings, making the microwave the perfect spot for them to settle down.
A dirty microwave can result in food poisoning, cross contamination, and a variety of viruses.
We should be cleaning our microwave after each time we use it but most of us don’t.
Our eraser sponges are the perfect tool to use to clean out a dirty microwave. You’ll need a few other supplies as well, but our eraser sponge will get you started.
Using our eraser sponge, scrub out any food splatters from walls, rotating tray, and door.
This will help get all of the tough spots cleared out first.
Some food may be hard to remove but the eraser sponge can handle tough grit, grime, and dirt.
(All of which are in a household microwave!)
After you clean the microwave with our eraser sponge, you should steam clean the appliance.
Using a microwave-safe bowl, vinegar, water, and a sponge, you can get your microwave looking brand new. Pour an equal amount of water and vinegar into a bowl, usually half a cup of each works well.
Put a toothpick into the solution before you start. You’ll notice that bubbles form on the toothpick allowing it to boil without exploding.
Leave the bowl in your microwave for about 5 to 10 minutes depending on how dirty it is. When the minutes are over, let the microwave stand with the door closed for several minutes allowing steam to penetrate the microwave.
Be sure to have oven mitts on hand in order to take the bowl out which will be extremely hot.
After you remove the bowl, stick the eraser sponge into the bowl when the solution is still hot and scrub the rest of your microwave.
Make sure you wipe down corners, windows, walls, and the outside of the microwave as well.
Our eraser sponges are also disposable so once it cools down, it can be thrown out. Visit Spongeoutlet.com for more of our cleaning products, and enjoy your “new” microwave!
The smell of pine in the air, the dusting of snow on the ground and the joy in your children’s voices as you choose a Christmas tree.
These are some of the best parts of the holiday season.
While there are few things more beautiful than a live Christmas tree decorated and displayed in your front window during December, there is nothing more frustrating than getting tree sap on your vehicle and floors.
Although it seems easy enough to wipe away when wet, tree sap leaves a sticky reside and hardens quickly into a gooey and difficult-to-remove mess.
Not only can tree sap be a pain to get off your hardwood floors, it can also cause damage the paint on your vehicle.
There are many families that no longer get a live Christmas tree just for this reason. Instead of opting for an artificial tree and lighting pine scented candles around your home around your home, enjoy the fragrant scent and unique beauty of a live tree without worrying about the sticky sap.
SpongeOutlet has everything you need to keep your home and car sap-free throughout the holiday season.
Our Eraser Sponge is perfect for spot cleaning, and our Melamine Floor Pads are great for scrubbing the whole floor after you take down your tree in January.
Tough on dirt without damaging walls, floors or the surface of your vehicle, SpongeOutlet’s products are perfect for the post-holiday cleanups. Just remember to spot test a small area before getting to work.
Deep Cleaning Your Bathroom with help from Eraser Sponges
A new year means a new start at making this year better than last year.
One of the best things you can do for yourself is give yourself a clean house.
It won’t happen overnight but you can start with one room at a time. First let’s start with the bathroom.
Fully Cleaning the Shower
Take the shower head off the wall and place in a bag with white vinegar.
Tie up the bag and let set overnight.
Take down your shower curtains and wash them in your washer with a few towels.
The towels will act as micro scrubbers.
Then use your eraser sponges to clean all the nooks and crannies of your shower, including doors and tiles.
Use an Eraser Sponge on the Walls
Use the Eraser Sponge to remove all mildew spots from tiles and grout.
If you come across very stubborn spots use a tooth brush with bleach to get it all clean.
Scrub Down the Toilet with Sponge Eraser
Put a cup of baking soda into the bowl and let sit for a few minutes then flush.
All spots should be gone, if not use a piece of an eraser sponge to get stuck on spots.
Then you can continue to use other parts of the eraser sponge underneath the toilet seat and on the outside of the toilet.
Now you need to clean that toilet brush- using the toilet seat to hold it between the bowl and the seat, pour bleach on top of it. Then clean out the brush holder by letting it soak in soapy water.
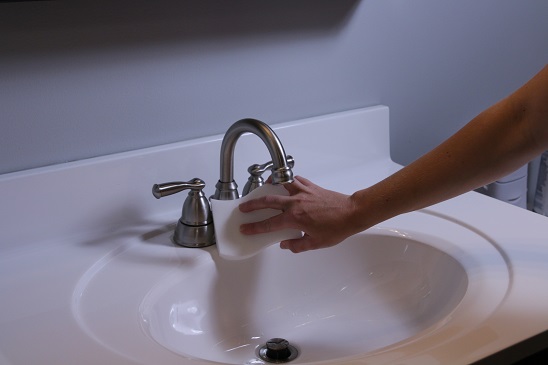
Get spots and grime off of the Sink
Use white vinegar to pour down the drain and flush with hot water.
Then use eraser sponges to clean the faucet and vanity top.
To get into the tiny cracks under the faucet handles use dental floss to pull out all grime.
Hand Towels
Use the sanitizing setting on your washer to clean them. Or even better just replace them every 3- 4 days.
Tackling one room at a time will help you start to see a visible difference in your home.


 uer a lot of dishes at once.